

Learn QuickBooks Online - Customize Invoice
- Jan 20, 2017
- 3 min read
Read step-by-step instructions
Navigate to the Company Settings Menu
From the home screen, click on the Gear Menu. Beneath the column heading “Settings,” select the Custom Form Styles tab.

Edit an existing Form Style
On the Custom Form Styles page, you can edit an existing form or create an all new one from scratch. Let’s edit the default existing one named “Standard” for now.
To open this form, click the Edit button beneath the column labeled “Action.”

Choose a Style
In the style navigator, choose one of the five styles from the left, whichever you like best.

Add Your Logo
In the Logo box, click the drop-down caret then select Upload to choose an image file from your computer.

Use the slider to resize your Logo image to your liking.
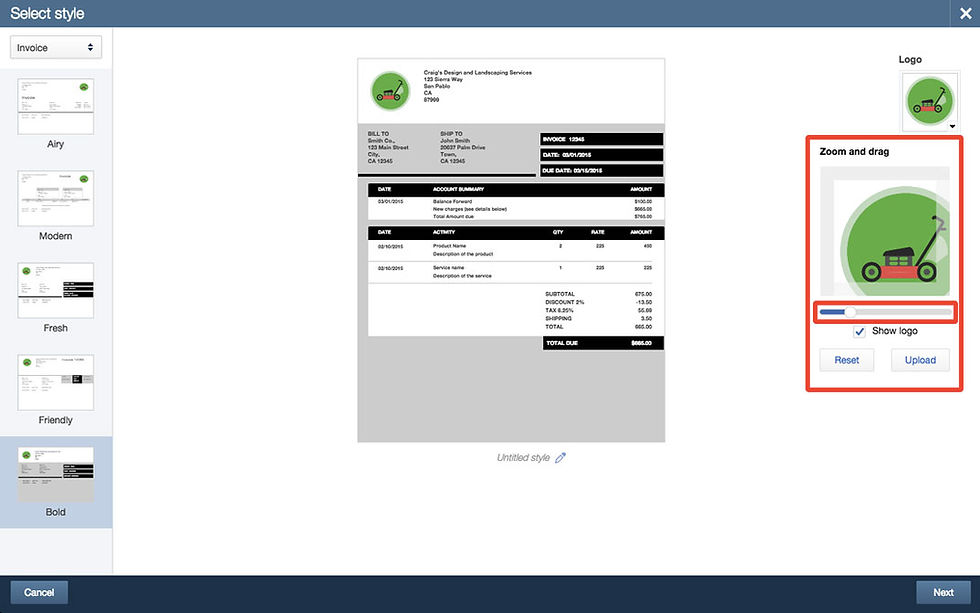
Click and drag directly on the logo image to reposition its placement. If you want to return it to its original position, click Reset at any time.

Customize Color Palette
In the Color box, click the drop-down carrot to open color options. QuickBooks tries to automatically match the form’s appearance to the colors in your logo, but feel free to try some different colors from the color palette on the right.
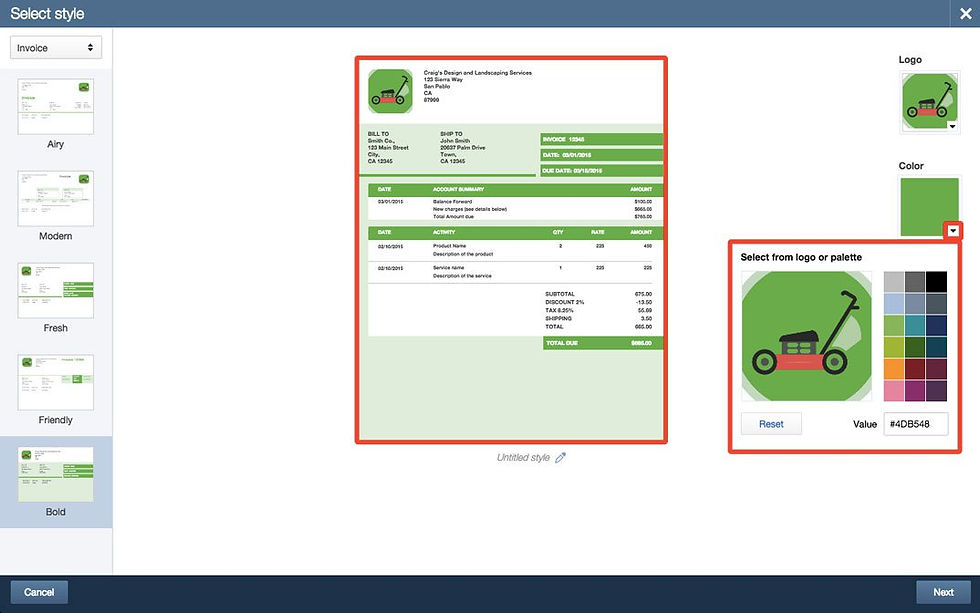
You can also click directly on your logo image to use a Color Sample tool to select whichever shade you click on from your logo.

Title Your Form
To give your custom sales form a title, click the Edit pen below the preview sample.

Whatever you type here to title your form style will be visible to you alone, not to your customers, so choose a custom title that best describes the form for your needs. Click Next to continue making other changes.

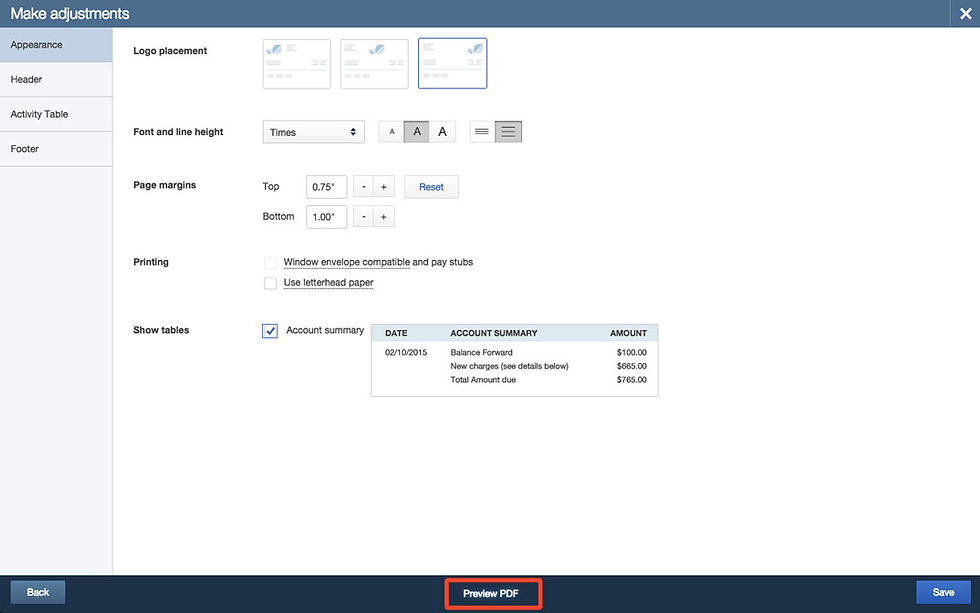
Change Appearance Details
Next, you’ll see the Make Adjustments navigator. Here you can change things like the overall Appearance, Header, Activity Tables, and Footer messages.
To customize your form’s appearance, click on the Appearance bar and try choosing a different font and line height.

You can also add an Account Summary to your form so your customers can see any unpaid dollar amounts from prior invoices. To do this, check the box marked Account summary in the “Show tables” section of the Appearance sub-menu.

Preview PDF
Click Preview PDF to see your changes. It’s a good idea to preview as you go along to make sure that your form is shaping up the way you like.
Change Header Details
Now let’s try making some adjustments to your form’s header details. Click on the Header tab, then in the Form names type a new name into the Invoice field (e.g., “Proposal”).

In the Company section, add contact information to your header by checking the boxes next to Company name, Address, Email, Website and Phone. This will add contact information to the top of your form and make it easy for your customers to get in touch with you.

In the Customer section, click the boxes to outline your terms, due dates, shipping fees and payment method.

Edit Activity Table Details
The Activity Table section shows your customers what they bought. You can add descriptions to explain what was sold and what it cost.
For example, in the Columns section of the Activity Table sub-menu, check Quantity, Rate and Amount. You can update these with different labels and change column width and order so that the table appears exactly as you want it to.
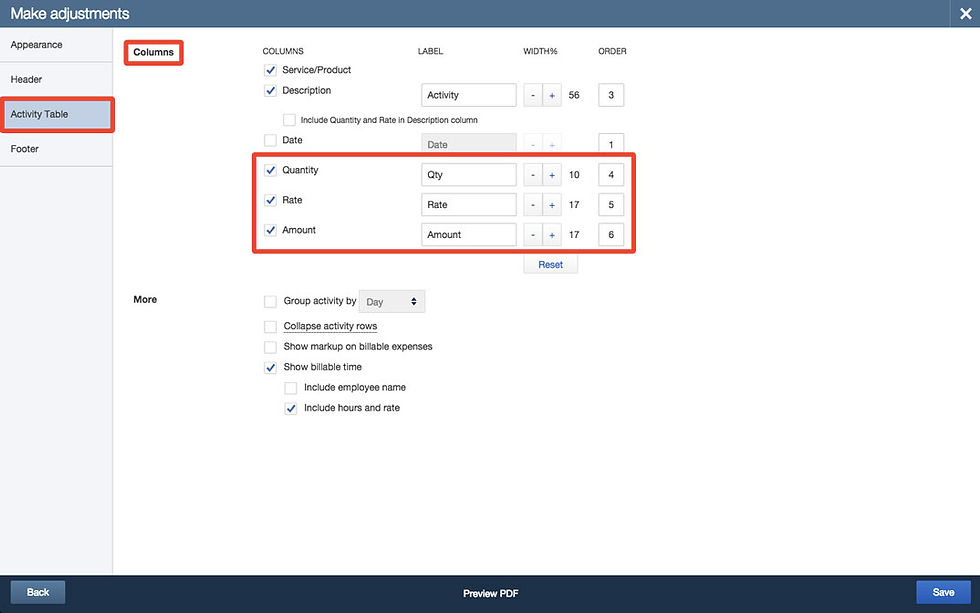
If you need more options for billable activities, time and expenses just click the boxes corresponding to the new fields you want to add to your form in the “More” section.

Edit Footer Details
Use Footer options to tack on extra details such as service notes, business slogans and legal disclaimers. You can also type a pleasant message or salutation to your customers here. Be sure to Save your changes when you’re finished.
And that’s it! Your custom form is ready to use. Try customizing one of your own forms or creating one from scratch. Have fun and play with it — you’re the designer now.

Comments